
Plugins are code libraries built by developers when they need to implement customized logic
WHEN SHOULD I USE A PLUGIN?
First, you should understand the difference between a plugin and a workflow. Workflows can trigger limited events, while plugins can handle a lot more. In addition, plugins actively extend the current behaviour of Microsoft Dynamics 365 components. Some examples of when you might want to use a plugin include:
- Needing business logic that updates specific fields in a record when creating or updating information using a Dynamics 365 application.
- Wanting to call external web services or other events that call for saving or deleting a record.
- Needing to perform dynamic calculations on field values when a user opens a record.
- Wanting to automate certain processes like sending emails to customers whenever someone triggers a specific event within your CRM.
CREATING A DYNAMICS 365 PLUGIN WITH DYNAMICS 365:
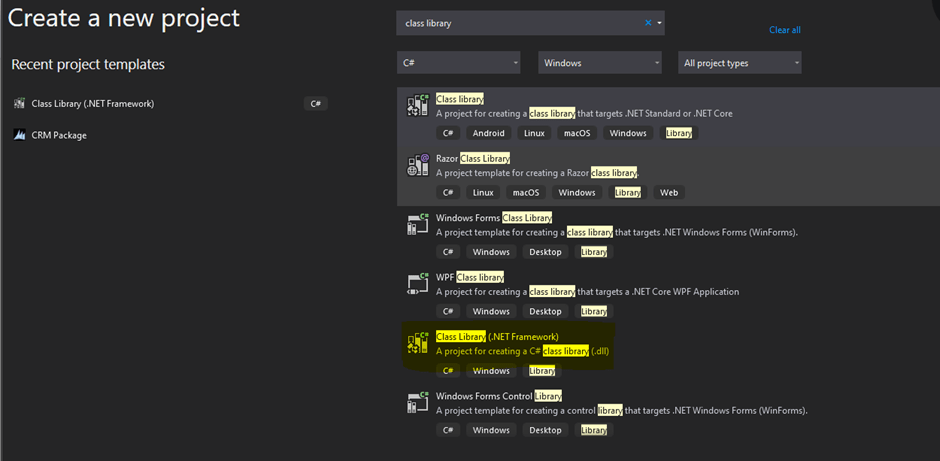
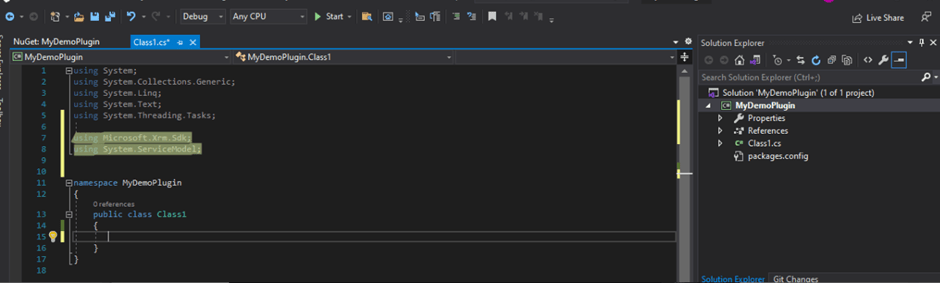
- Start your instance of Visual Studio, then create a new Class Library project using the .Net framework. Look for the latest version available. Again, make sure it’s at least 4.5.2 or higher.
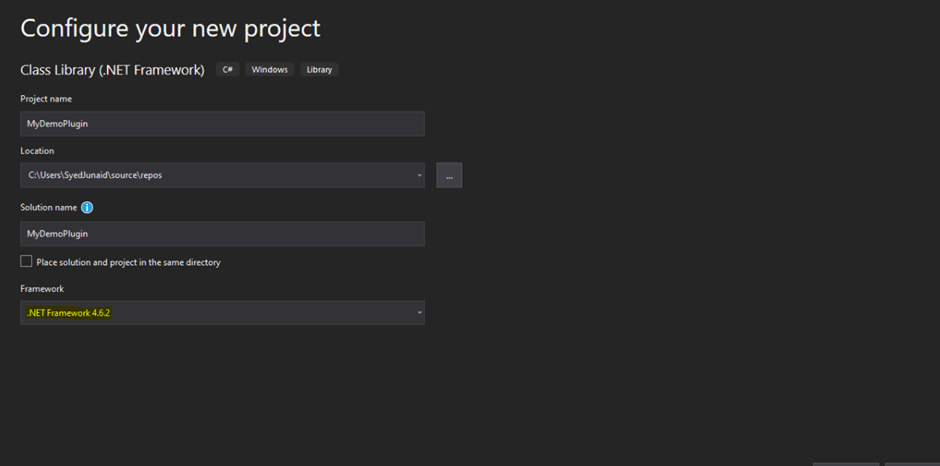
- Enter a name for the assembly you’re building in the Name textbox.
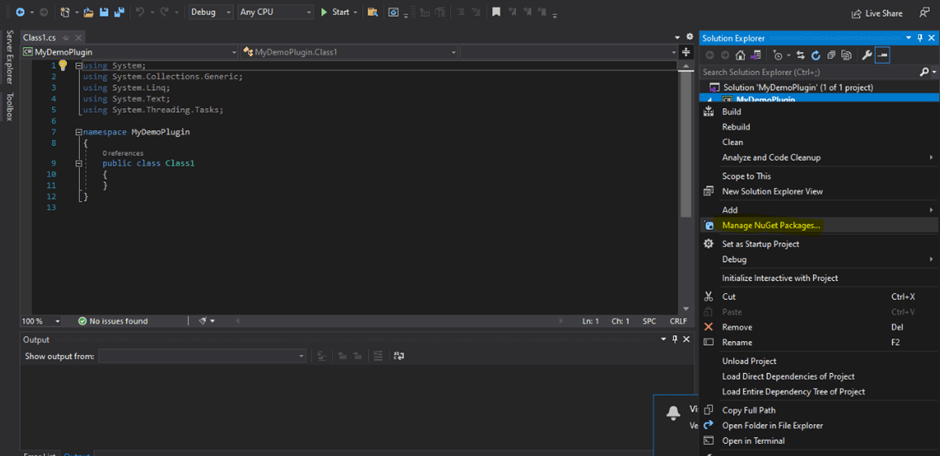
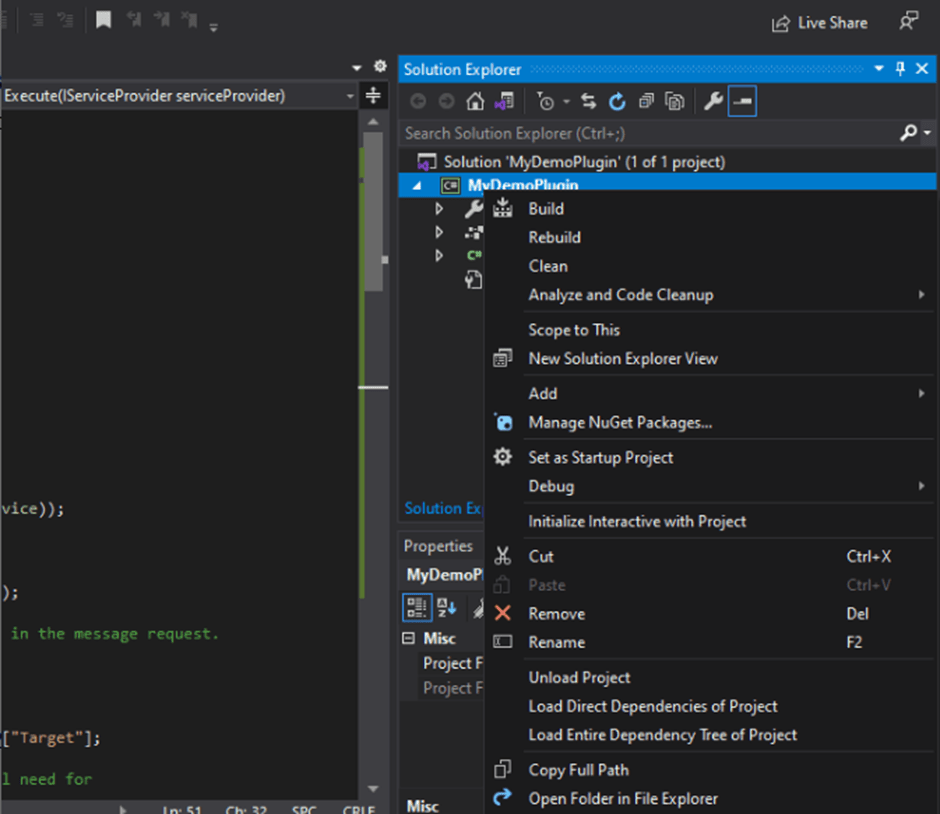
- Go to Solution Explorer. Right-click on the project, wait for the context menu to appear, then choose the Manage NuGet Packages… option.
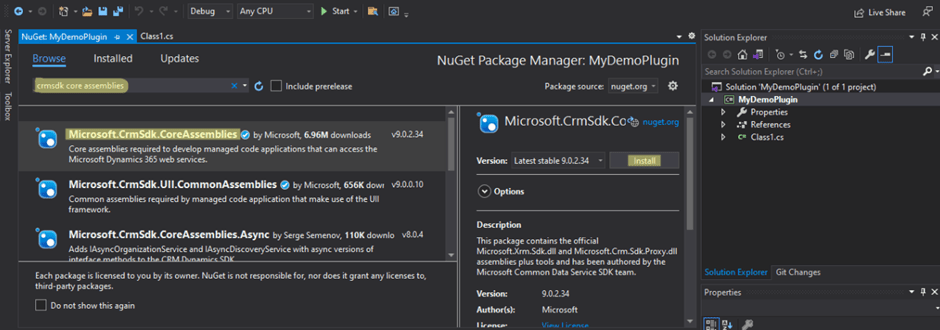
- Choose Browse, then enter the search term, “Microsoft.CrmSdk.CoreAssemblies.” Once it pops up, install the most recent version available.
- Make sure you click on “I Accept” when the License Acceptance dialog appears.
- Once the installation completes, go back to Solution Explorer. Click on the “Class1.cs” file, then select Rename from the menu.
- Change the name of “Class1.cs” to something that more closely matches the intent of your plugin.
- You should receive a pop-up that asks you if you wish to rename the class in your project to match your new file name. Select “Yes” to allow the update.
Now that you’ve created your project, you can edit your .cs file to implement the required business logic for your new library. Once you’re done, you’ll need to compile the assembly by hitting the F6 key. Once it compiles without errors, you must sign the plugin.
- Go back to Solution Explorer, then right-click on your plugin project. Select Properties from the context menu.
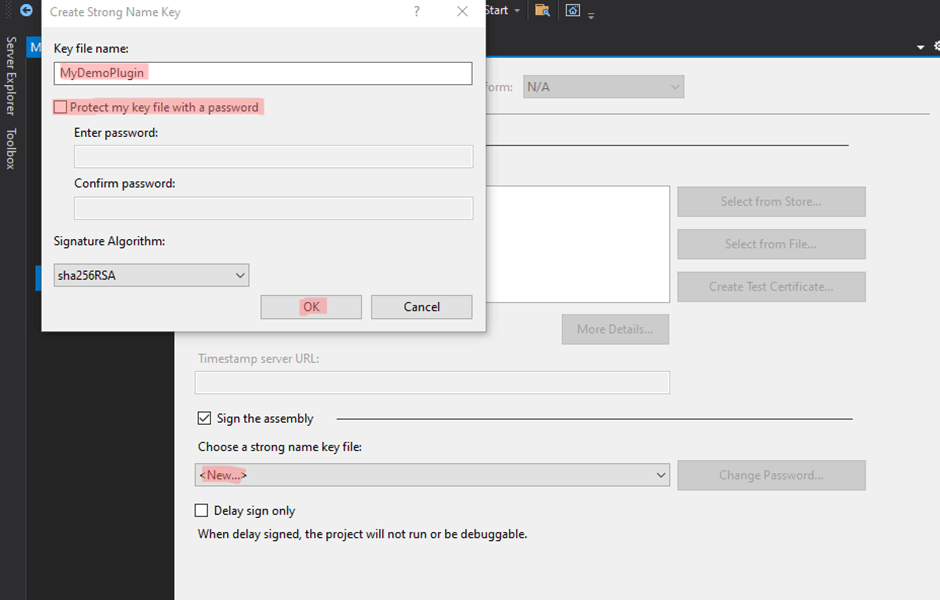
- Select the Signing tab from your project properties, then click the Sign the assembly checkbox.
- Go to the Choose a strong name key file dropdown and select New.
- Enter text for the key file name, look for the Protect my key file with a password checkbox, and make sure it’s unchecked.
- Select OK.
- Go to the project properties Build tab and verify that the project’s Configuration is set to Debug.
- Hit the F6 key once again to rebuild your plugin.
- Go to Windows Explorer and look for the following path for your newly built project: \bin\Debug\BasicPlugin.dll.
Make sure you change your build version to release when you’re ready to include the plugin with your solution. Next, you’ll learn how to register a plugin in Dynamics 365.
REGISTERING A PLUGIN IN DYNAMICS 365
- Download the Plugin registration tool using NuGet or PowerShell, then open it by clicking PluginRegistration.exe.
- Connect to your instance by selecting Create new Connection. Make sure you have office 365 selected.
- Enter your Microsoft Account credentials, then click Login. Note that if your account provides access to multiple environments, you’ll need to pick the correct one.
- Once you connect, you should see any existing plugins and workflow activities registered previously.
Now that you’ve accessed the right environment, you can register your new assembly.
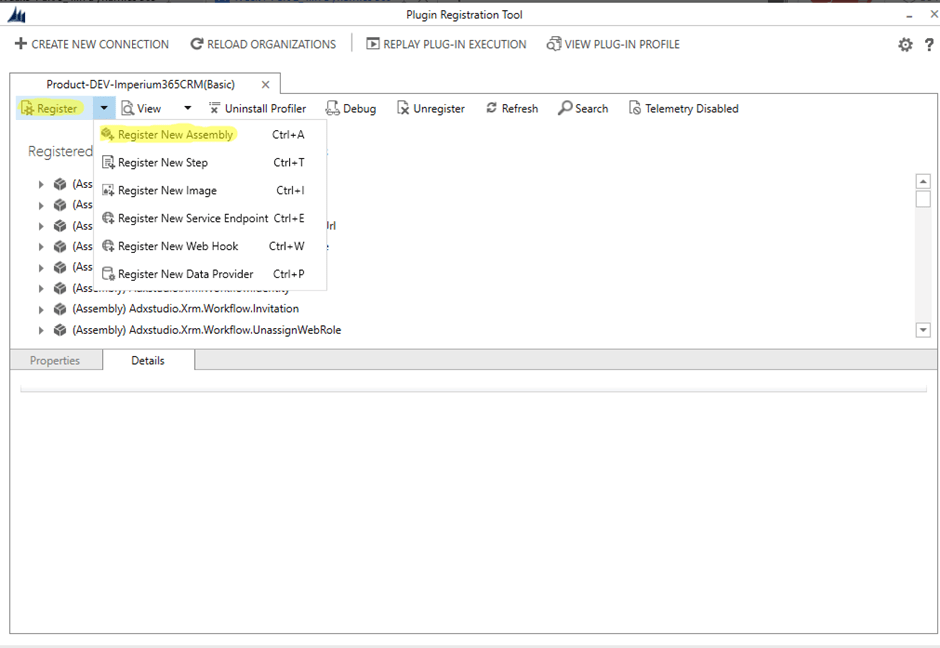
- Go to the Register drop-down and select the New Assembly option.
- Click the (…) ellipses button that appears in the Register New Assembly dialog, then look for the assembly you built in the section that went over how to create a plugin for Dynamics 365.
- If you’re using Microsoft 365, make sure that you have isolation mode set to sandbox and Database selected for storing the assembly.
- Next, click on Register Selected Plug-ins. You should see a confirmation dialog appear.
- Click the OK button to close that dialog and the Register New Assembly dialog. The new assembly should now appear.
Once you’ve gotten the hang of how to register a plugin in Dynamics 365, you should look into how to debug a plugin in Dynamics 365 to ensure functionality.
In Dynamics 365, when a plugin is run, it executes based on a pipeline execution model.
Plugins can be triggered by:
- A user action in the Dynamics 365 user interface, such as retrieving a record
- Events triggered by the Organization Service or the WebAPI, such as retrieving a record
Post-Operation events in the pipeline are processed either:
- synchronously – these plugins are are executed immediately and run in a specific order
- asynchronously – these plugins are executed by the Queue Agent and run later by the async service
Other events are processed synchronously.
The event pipeline is as following:
| Event | Stage name | Stage number | Description | Sync/Async |
| Pre-Event | Pre-validation | 10 | Executes before the main system operation and outside the database transaction. | Sync |
| Pre-Event | Pre-operation | 20 | Executes before the main system operation and executed within the database transaction. | Sync |
| Platform Core Operation | MainOperation | 30 | This is the actual platform operation. No plugins registered here. | |
| Post-Event | Post-operation | 40 | Executes after the main operation and within the database transaction (if sync). | Sync and Async |
Plug-ins that execute during the database transaction and pass an exception back to the platform cancel the core operation.
The pipeline is detailed here.
Hand’s On:
For creating a plugin, we have to follow following steps:
- Open Visual Studio and create a Class Library (.NET Framework) project.
- Give a meaningful project name and use .NET Framework 4.6.2 as Framework and create the project.
- Now go to Manage NuGet Packages by right clicking the project.
- After that, search for CrmSdk Core Assemblies and install it and import those.
- Now we have all the packages required to develop a Plugin. Now we import the namespace which is required to get all functionality of Crm Sdk and for plugin development.
using Microsoft.Xrm.Sdk;
using System.ServiceModel;
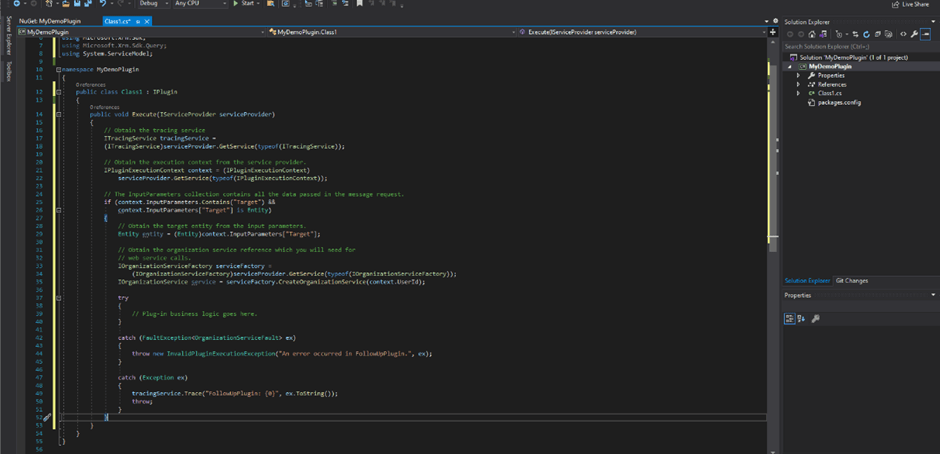
- After that, implement the IPlugin interface and add this code to the Execute Method.
// Obtain the tracing service
ITracingService tracingService =
(ITracingService)serviceProvider.GetService(typeof(ITracingService));
// Obtain the execution context from the service provider.
IPluginExecutionContext context = (IPluginExecutionContext)
serviceProvider.GetService(typeof(IPluginExecutionContext));
// The InputParameters collection contains all the data passed in the message request.
if (context.InputParameters.Contains(“Target”) &&
context.InputParameters[“Target”] is Entity)
{
// Obtain the target entity from the input parameters.
Entity entity = (Entity)context.InputParameters[“Target”];
// Obtain the organization service reference which you will need for
// web service calls.
IOrganizationServiceFactory serviceFactory =
(IOrganizationServiceFactory)serviceProvider.GetService(typeof(IOrganizationServiceFactory));
IOrganizationService service = serviceFactory.CreateOrganizationService(context.UserId);
try
{
// Plug-in business logic goes here.
}
catch (FaultException ex)
{
throw new InvalidPluginExecutionException(“An error occurred in FollowUpPlugin.”, ex);
}
catch (Exception ex)
{
tracingService.Trace(“FollowUpPlugin: {0}”, ex.ToString());
throw;
}
}
In this code, first we used ITracing which is a tracing service which enables us to write a log, IPluginExecutionContext gets the context of the event which triggered the plugin. Then we check if we have an entity present in the context. IOrganizationService is the service reference that is responsible for create, update and all other functions for records in CRM. After these steps your code should look like this
- Now we can write our business logic in the try block. Like if we want to create an account record we can write this in a try block.
//Create Account Entity Object
Entity accountObject = new Entity(“account”);
//Set Name, Email, Address Of That Account
accountObject[“name”] = “Goloknath Mishra”;
accountObject[“emailaddress1”] = “goloknath.mishra@outlook.com”;
accountObject[“address1_line1”] = “Singapore”;
//Setting Parent Contact
//Replace new Guid(“<guid>”) with your GUID
accountObject[“primarycontactid”] = new EntityReference(“contact”, new Guid(“<guid>”));
//Create Account Record. This function returns the GUID of the created account so that if you want to use it further in a code you can save it in a variable.
service.Create(accountObject);
Similarly, we have functions for Update, Delete, Retrieve, Associate etc which you can explore here. - The final step is to sign the plugin. For that follow these steps:
- Right click the project and go to properties
Go to signings and select sign the assembly
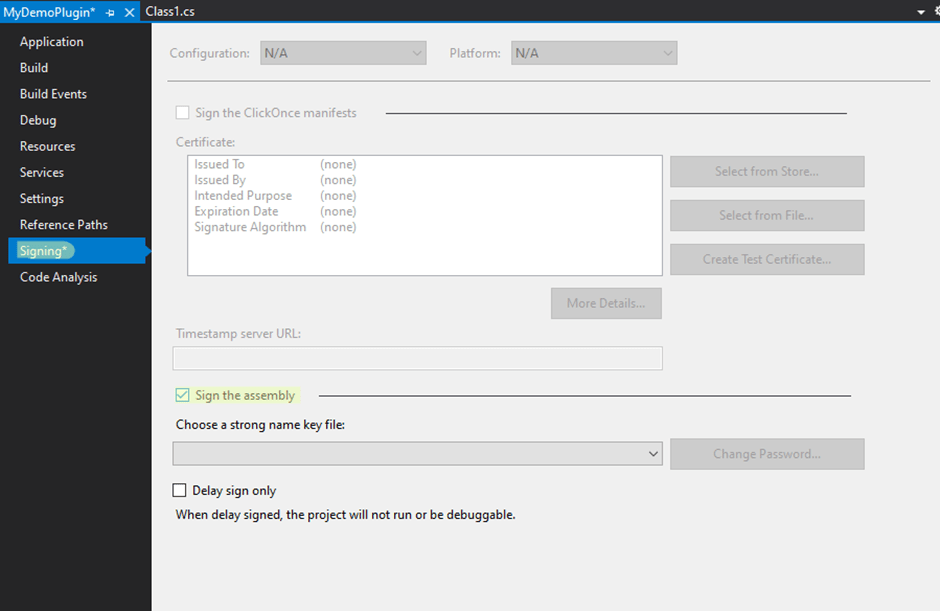
Now choose New, write the key file name and uncheck the protect my key file with a password checkbox and proceed.
After these steps build your project and your plugin is ready for registration.
After the creation of the plugin, we have to register our plugin on events like Create, Update, Delete etc according to the business requirements.
Required components to register a plugin are:
- Plugin Registration Tool
- Plugin(.dll file) you want to register (In your project > bin > debug > {projectname}.dll).
For registering a plugin we have to follow following steps:
- Open Plugin Registration Tool and create new connection.

- Put your credentials. Make sure to check the display list of available organizations if you are working with multiple environments. After Login, select the desired environment.
- After that, you will have a view of all the plugins registered in your environment. Now, in order to register our plugin go to register and select register new assembly.
4. Now select the plugin .dll file you want to register
5. After successfully registering the plugin, we have to register the step we want to trigger our plugin on for instance creation of contact.To register the step we have fill following fields
a. Message: It is the CRM message you want to register your plugin like Create, Update, Delete etc.
b. Primary Entity: It is the primary entity on which you want your message to register. Like if on the creation of contact we want to trigger our plugin, then our primary entity is contact.
c. Secondary Entity: Secondary entity is used when we have to Relate/Unrelate records otherwise it would be empty
d. Filtering Attributes: It is used in a message like Update so our plugin will fire on the selected filtering attribute fields. Like if we want our plugin to fire on the update of email, then our filtering attribute would be email so it will only trigger when email is updated.
e. Event Pipeline Stage of Execution: Discussed in another blog named Plugin Event Pipeline Stage of Execution
