Process mining vs Task Mining

Process MiningTask Mining
Process mining is to discover inefficiencies in organisation-wide processesTask mining is to discover tasks happening on the desktop
It enables you to gain a deep understanding of your processes using event log files by system of recording. Process mining displays process map with data and parameters to recognize performance issues.It provides insight by recording and collecting user action data to know how processes are performed, find common mistakes while performing tasks, and identify tasks that can be automated.
Process-orientedUser-oriented
See the actual steps needed to perform your organization’s operation process and remove any guesswork.Understand what employees do while performing each task on their desktops.
Save time and money by optimizing processesIdentify and eliminate unnecessary actions in process tasks.
Detect noncompliant processes and/or tasksIdentify the most common actions through user interactions.
Discover automation opportunitiesAutomate tasks that would accelerate processes and reduce human errors

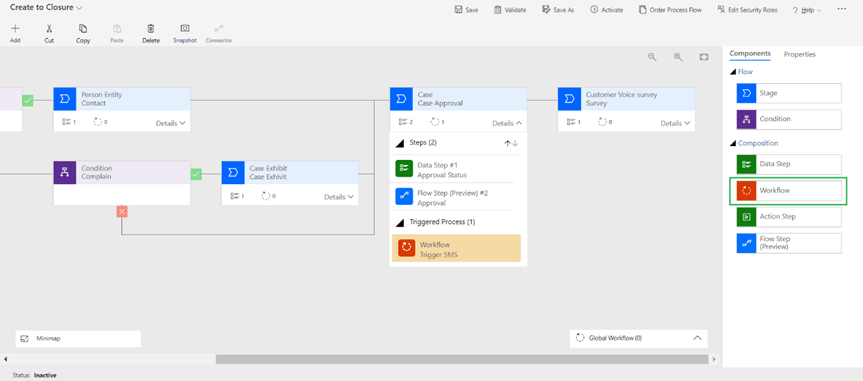
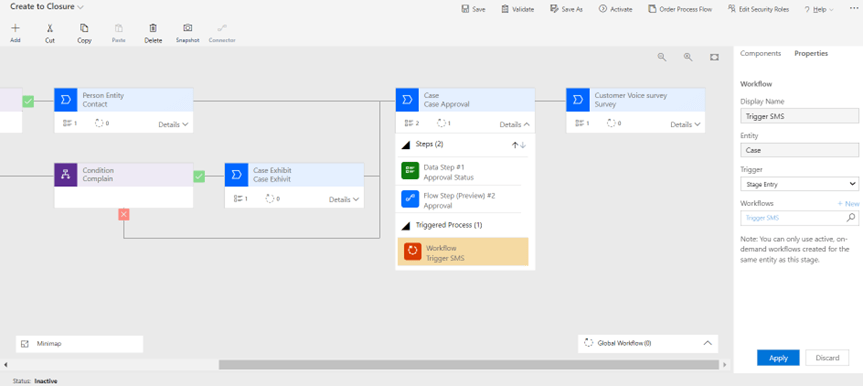
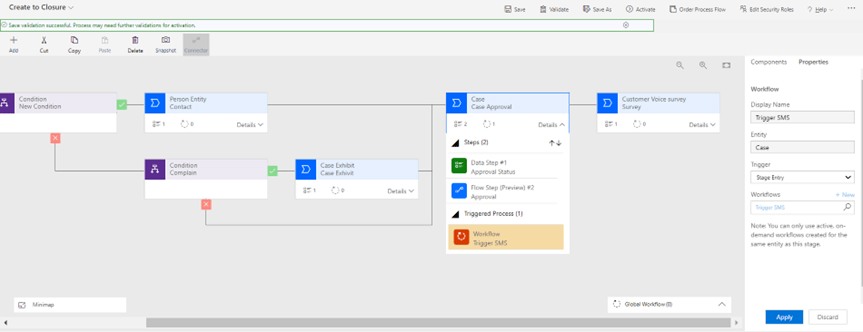
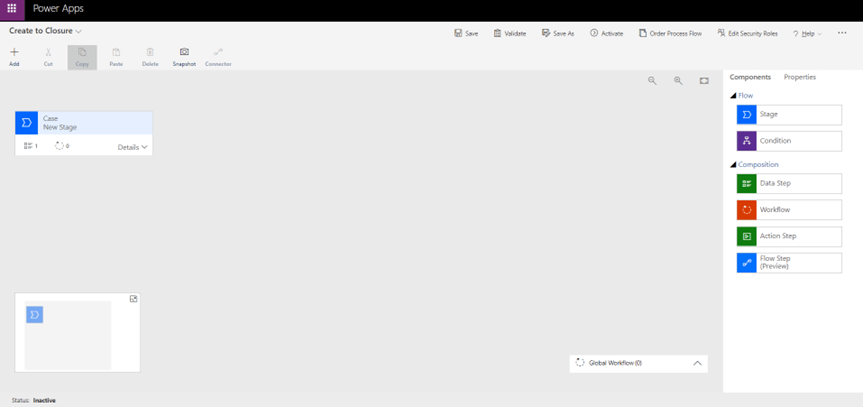
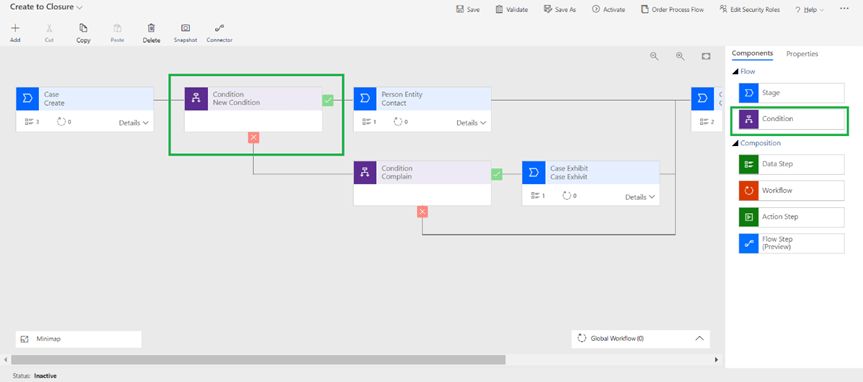
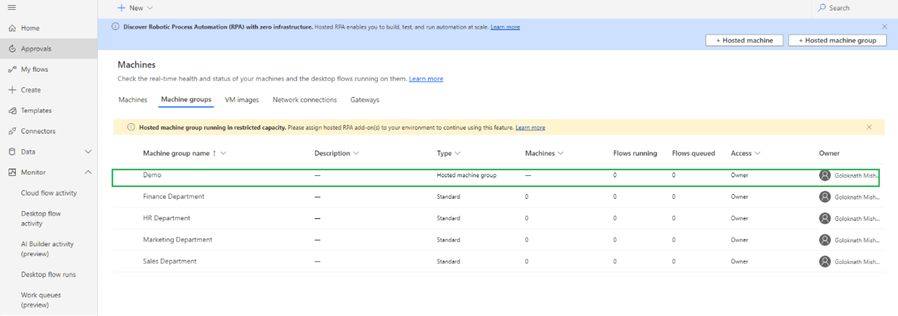
Process mining in process advisor is a valuable tool for businesses seeking to improve their operational efficiency and make decisions.

Benefits of process mining can be classified as below –

  • Improve operational efficiency
  • Enhance customer experience
  • Optimise resources
  • Ensure Compliance

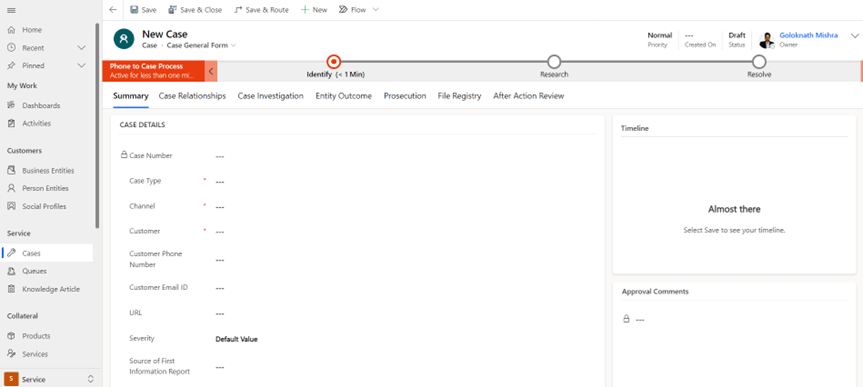
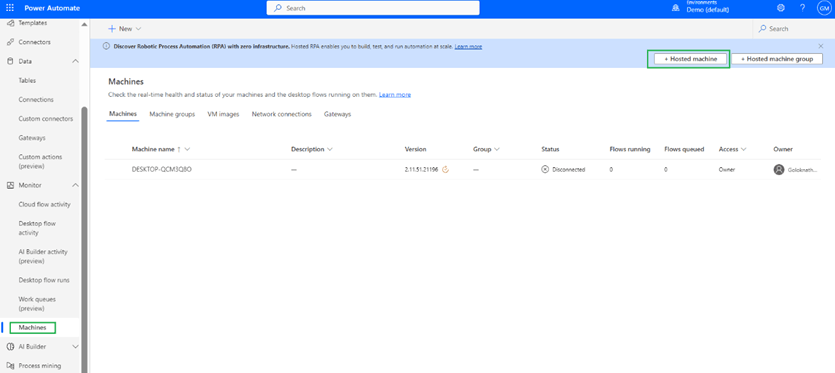
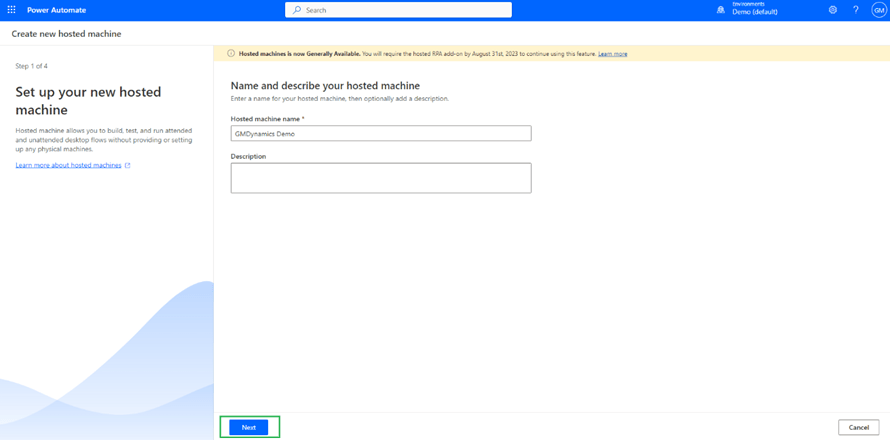
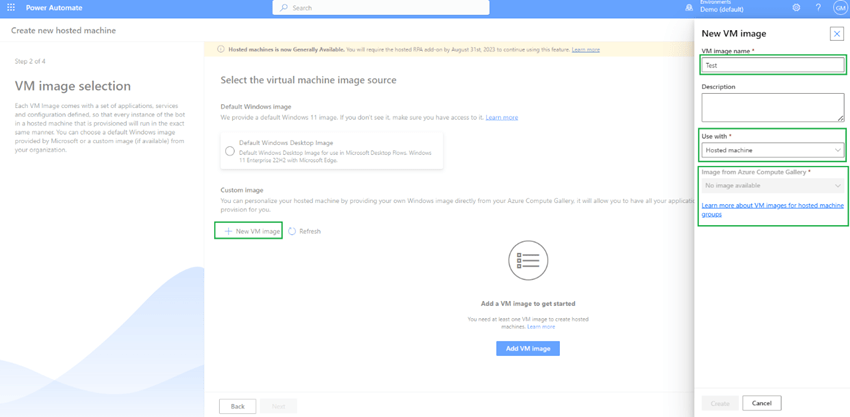
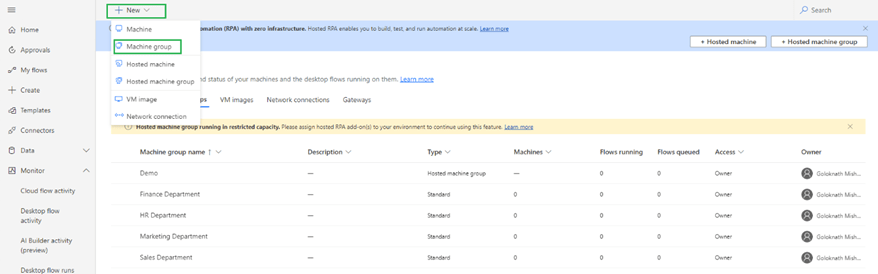
Task mining in process advisor helps to capture detailed steps for tasks performed on users’ desktop. Task mining has below components –

  • Prepare Processes and recording
  • Analyse processes
  • Visualize processes
  • Identify automation recommendations
  • Share processes

Rename, Ordering of BPF & Assign Security roles to BPF

You can assign BPF based on security role by using Edit Security Role feature as shown below

Now Case has 2 business process flow so you can select the order of BPF using order process flow button.

You can rename the BPF by expanding the workflow as shown below

Then click on validate and activate the flow as shown below

Once the BPF is activated you will see the deactivate button in replacement for activate button

Then add the new business process flow to app as shown below

Then save and publish so that changes will take effect.

Then navigate to case form it displays the out of the box phone to case process.

Then click on process and then switch process as shown below

Dialog will pop up both the flows to switch as shown below

Click Ok to switch the BPF and second BPF will display

Execute workflow and power automate flow from BPF

You can execute power automate flow from BPF by adding a flow step as shown below

Then fill up required information including name and flow name in current case it’s approval flow as shown

You can execute workflow from BPF by adding a workflow step as shown below

As per current use case I am triggering SMS through workflow which should be on demand in nature.

After BPF is ready click on save and validate as shown below and then click on activate button.

Switch & Conditional branching of business process flow

Case has standard phone to case process BPF (Business process flow) let’s built a second BPF for case.

Name second business process flow as Create to Closure

Enter steps for first stage Case Create

To add a conditional branching, drag condition component to the desired place between the stages.

Let’s add a condition if Case Type –> complain then Case Exhibit will display to fill the information

Machine, Machine Groups, Hosted Machine, Hosted Machine Groups in PAD

Hosted machines allow you to build, test and run attended and unattended desktop flows without providing or setting up any physical machines.

To create and use hosted machines you should have –

  • A valid and working Intune and Azure Active Directory tenant.
  • Intune device type enrolment restrictions are set to Allow Windows (MDM) platform for corporate enrolment.

Steps to create new hosted machine – Navigate to Monitor à Machine à Hosted machine as highlighted

A page will display to create a new hosted machine as shown. select a name of Hosted machine and description and click next

If you have any VM image available you can use or else can use default

When you click on + New VM Image you will see an option to select name along with options to use with – 1. Hosted Machine 2. Hosted Machine Group 3. Both

I have selected hosted machine but I don’t have any image available.

So, I have selected default windows 11 enterprise VM and then click next

If you want to add any custom network setup you can do by clicking + New network connection as shown

When I try to add a new network for me, I don’t have any azure virtual network as shown

So, I have not selected any network and clicked next. If you notice default network and VM Image is selected as shown

Then you will see below during provisioning of VM as shown

Once it’s provisioned you can see the machine as below

Hosted Machine groups can be created clicking on Hosted machine group as highlighted below

On click of Next you can see below in which you can select the feature to Re-use session.

On click of next you can assign maximum number of bots you want to run on this machine group

Select the VM image, I have selected default VM Image as shown

Choose how you want to connect to your bots next as shown below either you can

  • use work or school account.
  • Create and use local account

Once hosted machine groups are created you can see the status as below

On click of share you can share hosted machine group as highlighted

On click of settings you can select max number of bots, reuse sessions and enable maintenance mode.

You can see hosted machine group listed under machine groups as shown below

You can create new machine groups by clicking +New within machine group as highlighted below